Follow the steps below to ensure your emails (which are hosted on our virtual private servers) are set up correctly on your iPhone and iPad.
This guide assumes that your emails are using POP and not IMAP.
Please substitute the details in the screenshots below with your own. You should have received your email details from one of our friendly staff. If you didn’t please submit a support ticket

- Step 1:
Click on the Settings App 
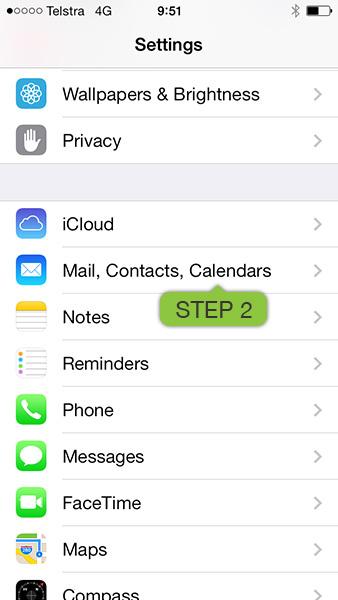
- Step 2:
Select “Mail, Contacts, Calendars” - Step 3:
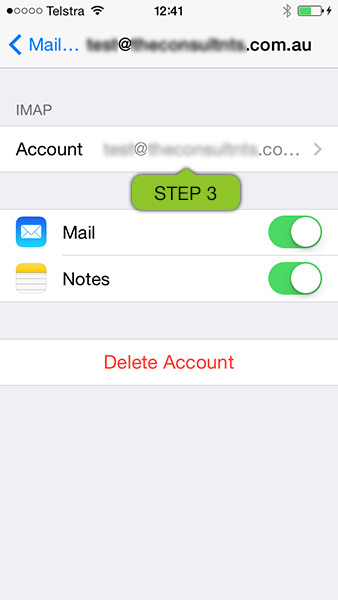
Tap the account the IMAP account you want to configure and then tap on the account again to enter the settings screen - Step 5:
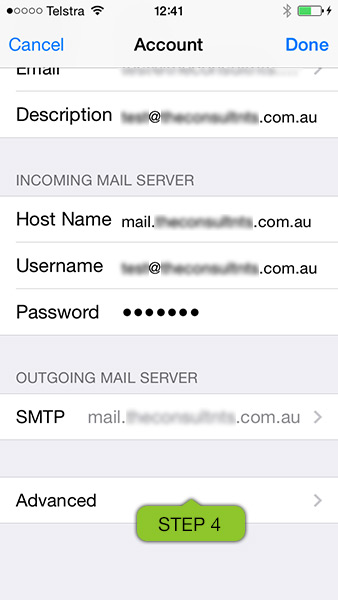
Scroll down and tap on “Advanced” - Step 6:
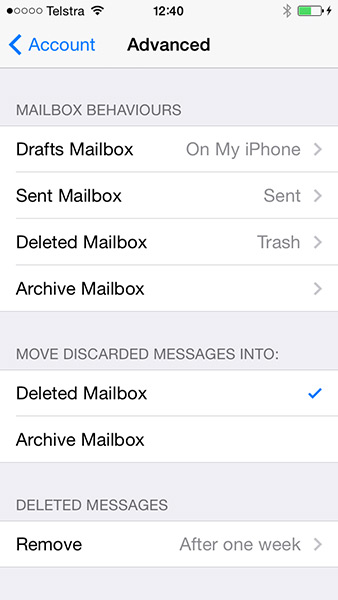
Tap on all Mailbox behaviour fields and ensure they are matched up the following way. “Drafts Mailbox” and “Archive Mailbox” should be stored on your phone. Sent mailbox and Deleted Mailbox should be matched with the servers mailboxes. See above screenshot for the ideal outcome once everything has been selected.