If Outlook won’t complete the automatic Google sign-in, a reliable workaround is to set the account up manually using IMAP + an App Password.
This guide walks you through the exact steps.
⚠️ Important: This method uses an App Password, which is a special password generated within the Google Worspace User Account. Your Google Workspace admin must allow 2-Step Verification and App Passwords for this to work.Google Help+2Google Help+2
Step 1 – Turn on IMAP in Gmail
First, make sure the mailbox actually allows IMAP connections.
- Log in to the user’s Google Workspace Gmail in a browser.
- Click the ⚙️ Settings icon → See all settings.
- Go to the Forwarding and POP/IMAP tab.
- In IMAP access, choose Enable IMAP.
- Scroll down and click Save changes.
Step 2 – Turn on 2-Step Verification (2FA) for the Google Account
App Passwords only exist if 2-Step Verification is turned on.
- Go to the user’s Google Account:
https://myaccount.google.com/security - Under “Signing in to Google”, click 2-Step Verification.
- Follow the prompts to enable this feature
Once 2FA is enabled, the App Passwords option becomes available if the Workspace security policy allows it.
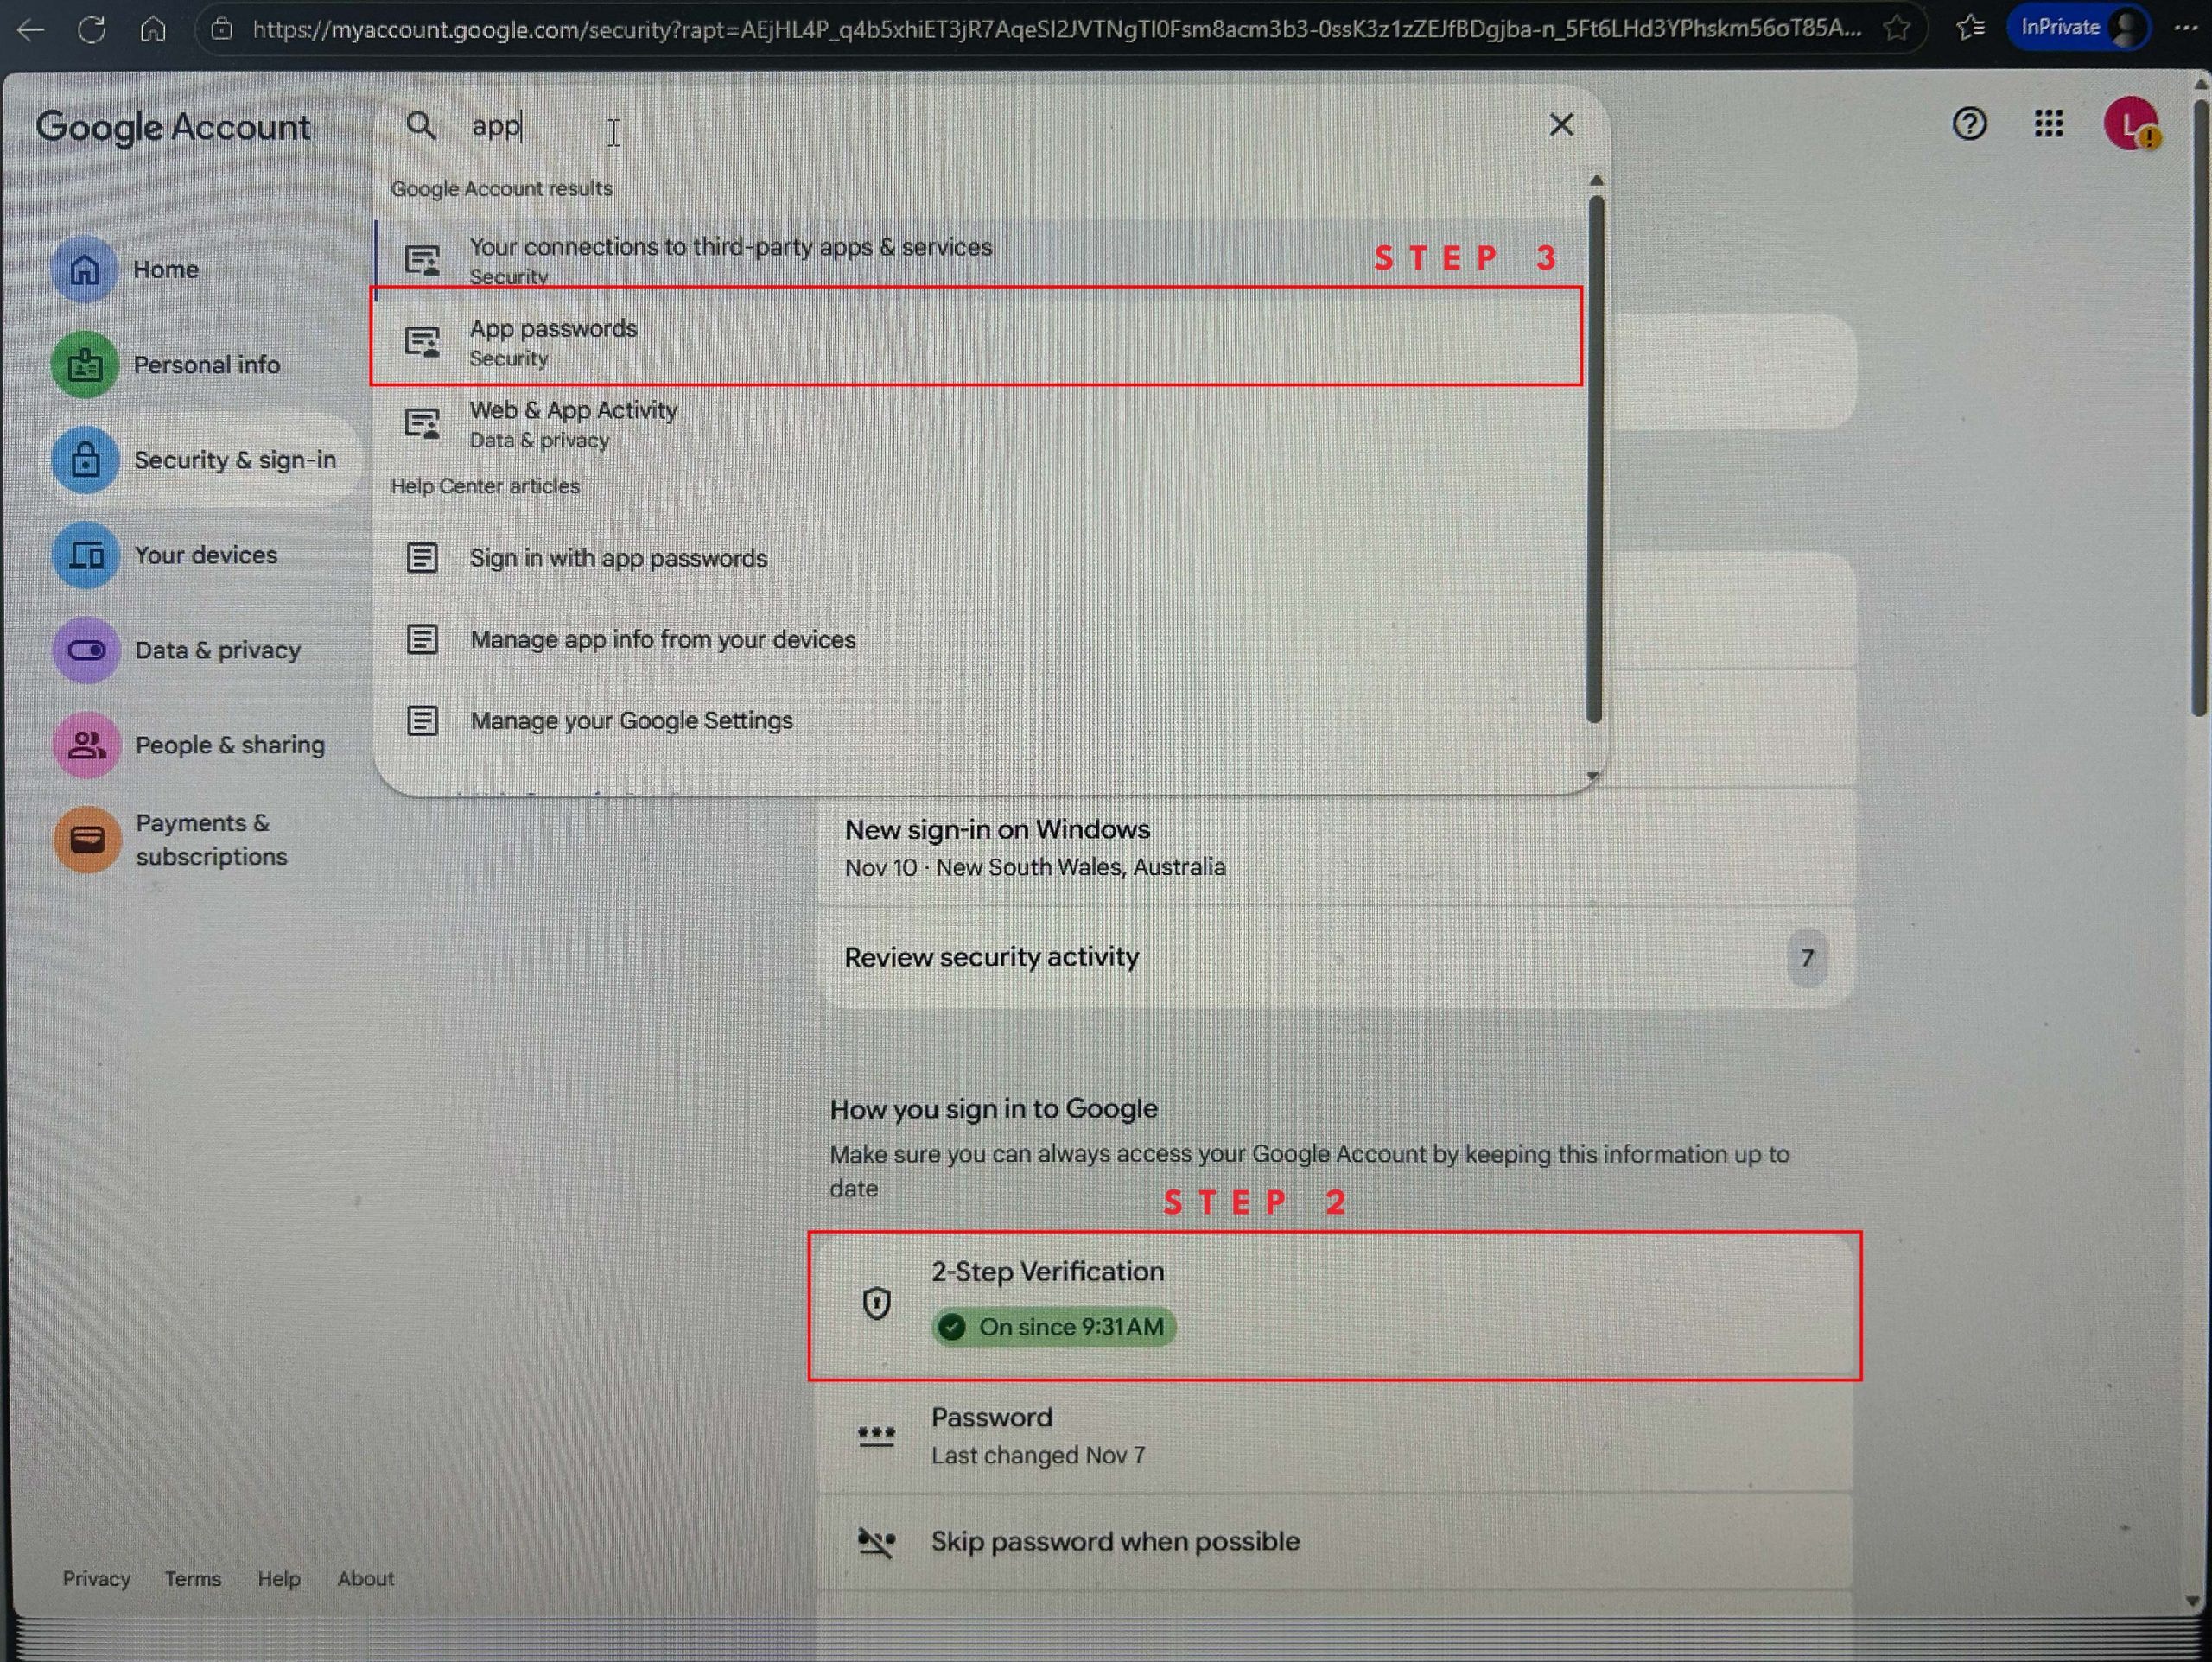
Step 3 – Generate an App Password for Outlook
Now we create a one-off password just for Outlook.
- Still in the user’s Google Account, use the search bar to look for “App passwords” and select this.
- Sign in again if prompted.
- Create an app password by giving it a name (i.e. Outlook) and click next
- Google will show a 16-character password with spaces (e.g.
abcd efgh ijkl mnop). Copy the password into a text file so you can recall if if need be. In Outlook, you’ll enter it without spaces (e.g.abcdefghijklmnop).
Step 4 – Add the Account Manually in Outlook
On the computer where Outlook is installed:
- Open Outlook (Microsoft 365 desktop).
- Go to File → Add Account.
- Enter the full email address (e.g.
name@yourdomain.com). - Tick “Let me set up my account manually” (or Advanced options → Let me set up my account manually).
This forces Outlook into manual mode instead of trying (and failing) to auto-detect everything.
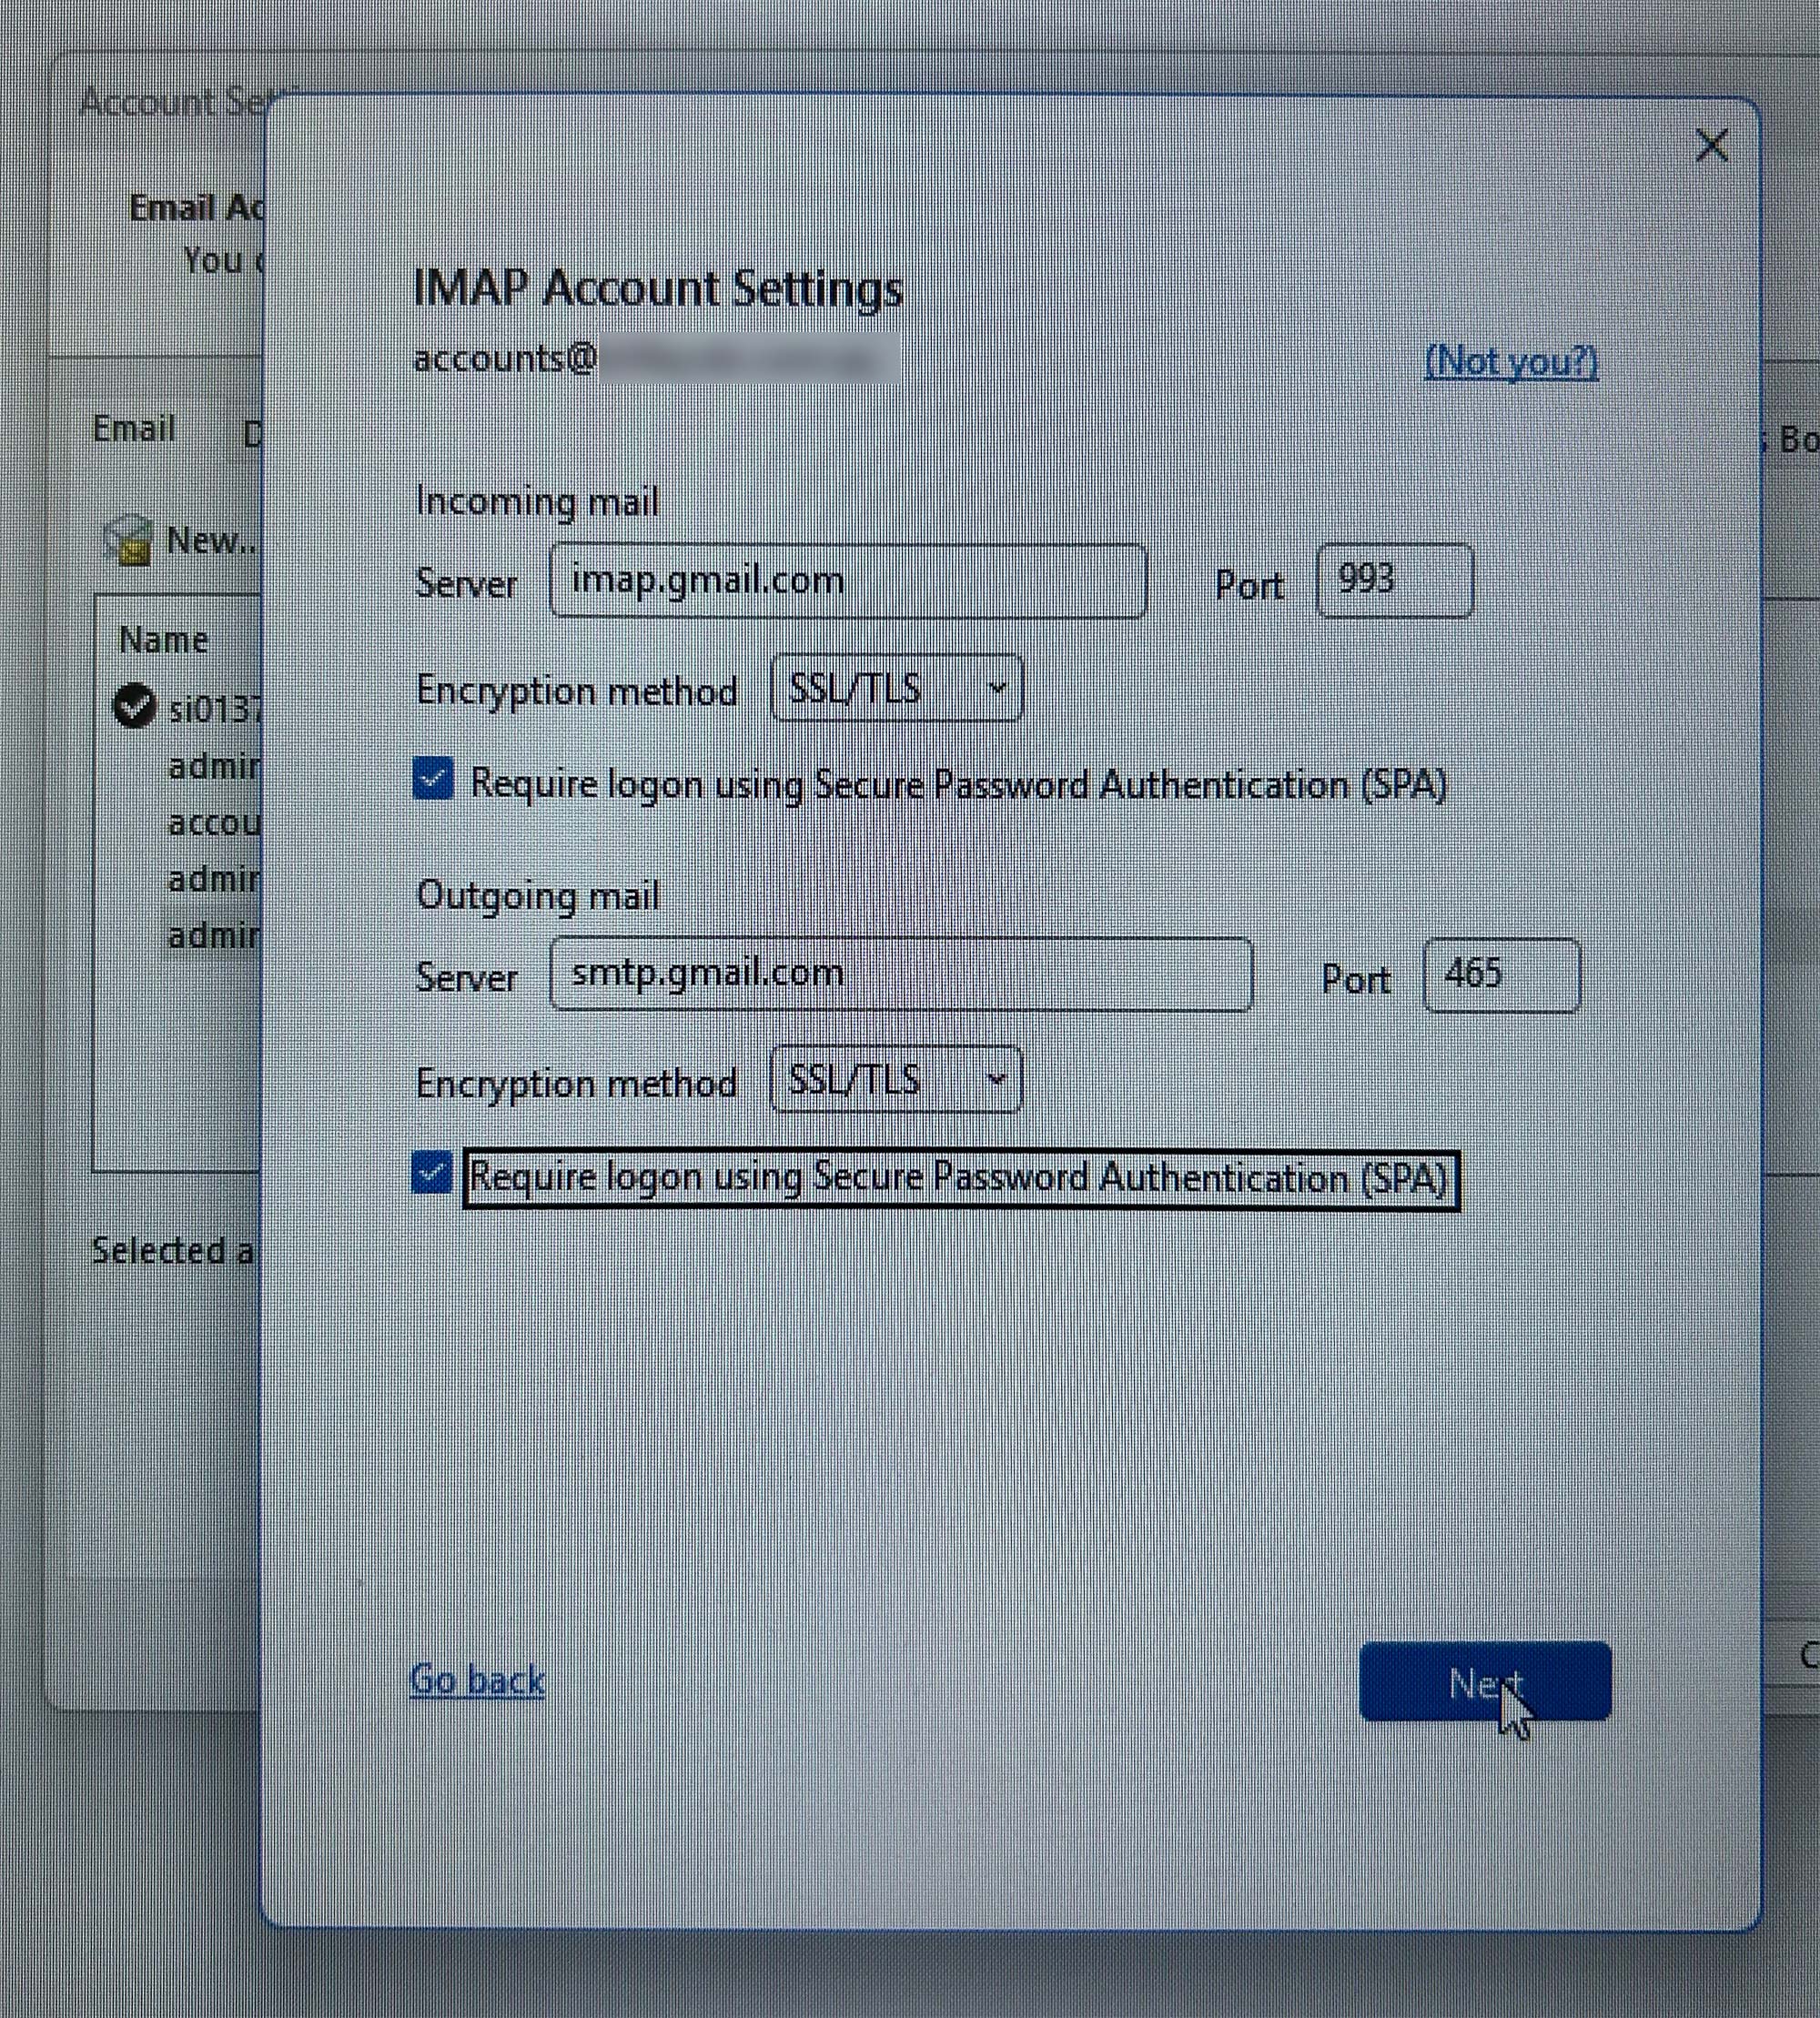
Step 5 – Enter the IMAP & SMTP Server Settings
Use these settings exactly:
Incoming mail (IMAP)
- Server:
imap.gmail.com - Port:
993 - Encryption: SSL/TLS
- Require login using Secure Password Authentication (SPA): Yes
- Username: full email address (
name@yourdomain.com) - Password: the App Password you generated (no spaces)Microsoft Learn+1
Outgoing mail (SMTP)
- Server:
smtp.gmail.com - Port:
465(SSL) or587(TLS) – either is fine, but 465/SSL is common.Google Help+1 - Encryption: SSL/TLS
- Require login using Secure Password Authentication (SPA): Yes
- Username: full email address (
name@yourdomain.com) - Password: the same App Password (no spaces)
Click Next
Step 6 – Complete the Google Prompt (If It Pops Up)
In many cases, after you enter the app password and click Next, Outlook will also:
- Open a Google sign-in window, or
- Ask you to grant Outlook permission to read, send and manage mail.
If that happens:
- Sign in with the normal Google Workspace password (not the app password).
- Approve any 2-Step Verification prompts.
- On the permissions screen, tick/allow options such as:
- Read, compose, send, and permanently delete all your email from Gmail
- Click Allow / Continue.
Once this is done, Outlook finishes the setup and starts syncing the mailbox.
Step 7 – Test Everything
Finally, send a couple of test emails:
- From this new account to your own email.
- From another address back to this Google Workspace mailbox.
Check:
- You can send without error.
- New messages arrive in Outlook.
- Sent items appear correctly in Sent Mail.
If all of that works, you’re done 🎉
Troubleshooting Tips
If something still isn’t working:
- Double-check IMAP is enabled in Gmail (both user and admin side).
- Make sure the App Password was entered with no spaces.
- Confirm your Google Workspace admin hasn’t disabled App Passwords or enforced security keys only (those setups can block app passwords entirely).
- Try switching SMTP port:
- From
465(SSL) →587(TLS), or vice versa.
- From